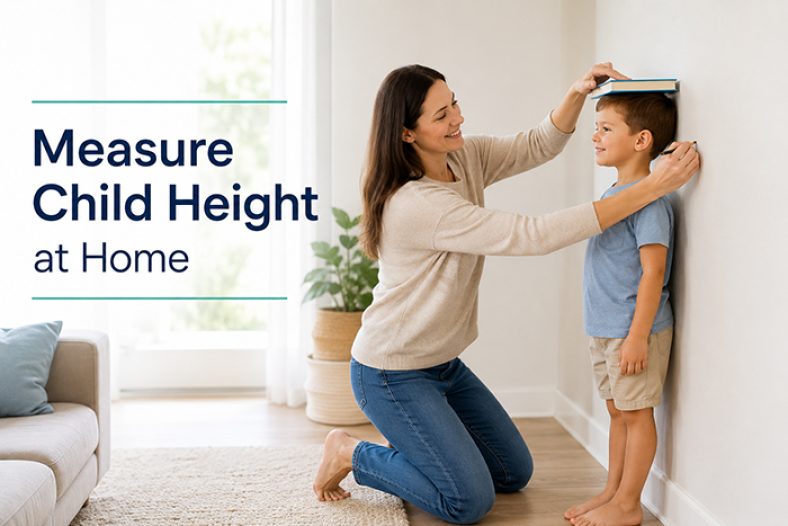
A tape measure and a wall sound simple enough — but most home height measurements are off by 1 to 2 cm, which is enough to hide a real growth problem or manufacture one that doesn't exist. Here's the technique clinics actually use, adapted for home use with equipment you already have.
Why the Details Actually Matter
A single measurement error of even 1 cm doesn't sound like much — but when you're using height velocity to check whether a child is growing normally, 1 cm is a huge chunk of the signal. A school-age child is expected to grow roughly 5–7 cm per year. If two measurements taken six months apart are each off by 1 cm in opposite directions, the calculated growth rate can be wrong by 4 cm per year — the difference between "growing normally" and "reason to see a pediatrician."
This is not about perfectionism. It's about making sure the number you write down actually reflects your child's height, and not the time of day, their posture, or which wall you used.
Four contact points
Heels, buttocks, shoulder blades, and the back of the head should all touch the wall. The head stays level — looking straight ahead, not tilted up or down — which keeps the measurement consistent from visit to visit.
What You'll Need
You don't need a stadiometer — the wall-mounted device clinics use. A flat wall and a rigid straightedge, used consistently, gets you close enough for meaningful tracking at home. What actually matters is doing it the same way, every time.
Measuring a Child Who Can Stand (Age 2+)
Measuring a Baby or Toddler Under 2 (Recumbent Length)
Children under 2 are measured lying down, not standing — this is called recumbent length, and it's a genuinely different number from standing height. Recumbent length runs about 0.7 cm longer than standing height in the same child, because gravity compresses the spine slightly once a child bears weight on their feet. This is already built into the WHO growth charts used for this age group, so don't try to convert it yourself — just measure lying down, consistently, and plot it on the WHO 0–2 chart, not the CDC 2–20 chart.
The 24-month switch: Pediatric charts switch from recumbent length to standing height at age 2, and from WHO reference data to CDC reference data at the same time. It's normal to see a small, one-time percentile shift right around this transition — that's the measurement method changing, not your child's growth changing.
Best Time of Day to Measure
Height genuinely changes over the course of a day. Gravity compresses the fluid in the spinal discs while you're upright and active, and that fluid redistributes overnight while lying flat. A study measuring adults at 7am and again at 7pm found an average height loss of 1.6 cm over the course of the day, with some individuals losing as much as 2.7 cm. Children show the same pattern.
The fix is simple: measure at the same time of day every time, ideally in the morning shortly after waking, before a full day of standing, sitting, and activity has compressed the spine. If mornings aren't practical, any consistent time works — the goal is removing time-of-day as a source of noise between measurements.
Common Mistakes That Throw Off the Numbers
| Mistake | Typical Error | Fix |
|---|---|---|
| Measuring with shoes on | +1–2 cm | Always measure barefoot or in thin socks |
| Door-frame pencil marks | ±1–2 cm | A pencil held at an angle, or a head tilted while marking, introduces parallax error. Use a flat object held level, not a hand-drawn line. |
| Measuring at different times of day | ±1–2 cm | Pick one time of day — ideally morning — and stick to it every time |
| Slouching or tiptoeing | ±1–2 cm | Check that heels stay flat and shoulders stay relaxed, not hunched or stretched |
| Single measurement, not averaged | ±0.5 cm noise | Always take two readings and average them; a third if the first two disagree by more than 0.3 cm |
| Carpet or soft flooring | Variable | Always measure on hard, level flooring |
| Hair accessories or thick braids | Up to 2+ cm | Flatten hair or remove accessories before marking the top of the head |
How Often to Measure, and What to Do With the Numbers
Every 6 months is the practical sweet spot for home measurement. More frequent measurements mostly add measurement noise rather than useful signal, since normal growth over a month or two is too small to reliably separate from a 0.3–0.5 cm measurement error. Measuring every 6 months gives enough real growth between readings that ordinary measurement error becomes small by comparison.
Good enough for tracking, not for diagnosis: A careful home measurement is accurate enough to track growth trends over months and years — which is exactly what matters for spotting a real problem early. It's not a substitute for the calibrated stadiometer at a pediatrician's office, and a single concerning-looking home reading is a reason to double-check your technique before it's a reason to worry.
Frequently Asked Questions
How accurate can a home measurement really be?
Done carefully — flat wall, barefoot, level head, averaged readings — a home measurement can get within about 0.5 cm of a clinical measurement. That's precise enough to track meaningful growth trends every 6 months, even though it won't match the sub-millimeter precision of a calibrated stadiometer.
Should I use a door frame with pencil marks?
It's better than nothing for a rough record over years, but it's one of the least accurate methods — a tilted head, an angled pencil, or a soft door frame all introduce error. If you want numbers accurate enough to calculate a real growth rate, use a flat wall with a rigid flat marker held level, not a pencil line drawn by eye.
Does it matter if I measure in the morning or evening, as long as I'm consistent?
Consistency matters more than which time you pick, but morning is still the better default. Height loss through the day happens gradually as the spine compresses, so a morning measurement is also the most reproducible one — evening readings can vary more depending on how active the day was.
My two measurements don't match — which one do I use?
Average them. If they differ by more than about 0.3 cm, take a third measurement and average the two closest readings. A small discrepancy between readings is normal and reflects the limits of manual measurement, not a real change in height.